
This post is in collaboration with NYC-based artist and friend of mine, Jane Chu!
Jane and I worked at the same store long ago and I have always been a fan of her artwork. I'm so excited to have her collaborate with me on the blog!


This dress was based as exactly as I could to the pattern that perhaps once came with the 1969 Simplicity sewing book. Mine didn't come with any patterns, but it does have a nice diagram of the patterns.


 I really love this fabric! It's a thicker polyester - it seriously has a feel of 70s poly but perhaps a higher quality version of that era type of fabric. I did have to be careful with my binding due to the thickness and even broke at least one needle.
The print on the fabric actually corresponds to the crosswise grain. So technically, this dress is cut incorrectly, but I knew going into it that it would be based on the print. I just couldn't resist placing the heavy print at the bottom and lighter print at the top! It was the perfect shirtdress print for me.


This dress sewed together almost too easily. I would have loved to put pockets into it, but I tried something new for me by having the zipper on both bodice and skirt potion of the dress. I'm usually a center back zip sorta person but this may have changed me a little.

Jane and I worked at the same store long ago and I have always been a fan of her artwork. I'm so excited to have her collaborate with me on the blog!
Artwork by Jane Chu
This is a dress I finished earlier last month around the 19th but haven't gotten around to posting it. My life has been changing a bit, but all very positive changes getting me going in the directions I have been wanting to go!
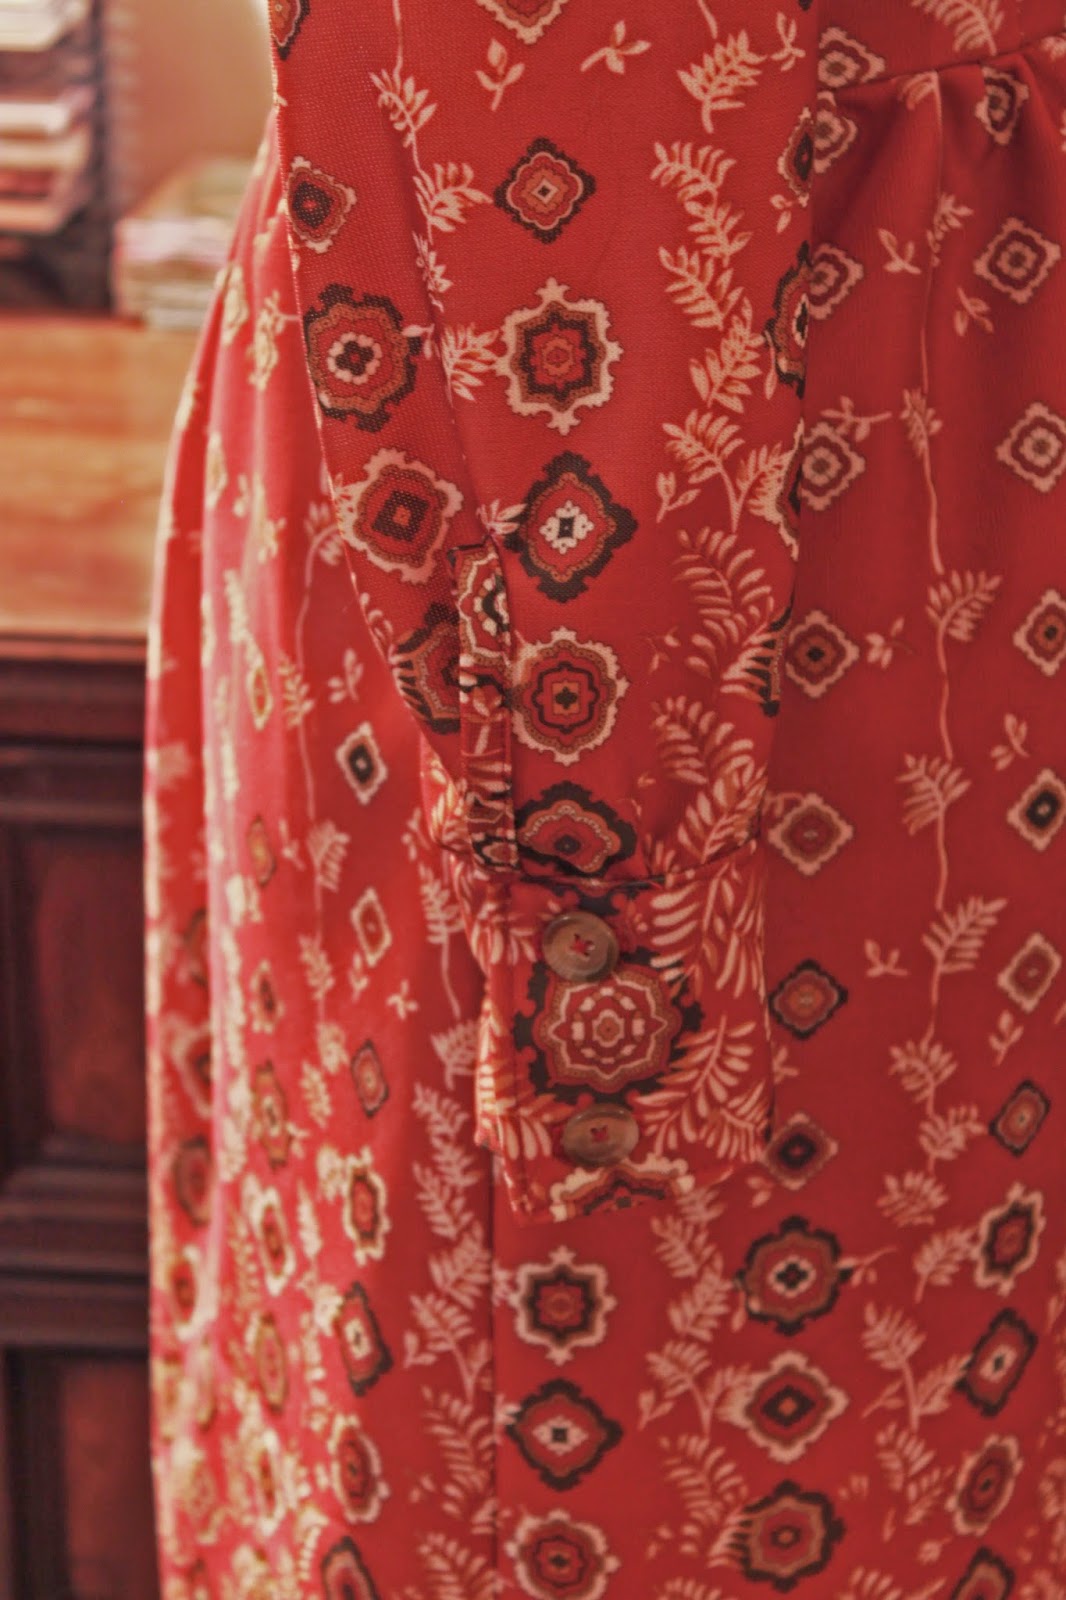
I was most of the way through making it when I realized though that if you have a cuff on your sleeve you need an extra opening piece - like a placket or a binding. Duh. I took the easy way out and created a binding from two 1 1/4" strips of fabric.
Cuff binding open.
Cuff closed.
Being dorky with the book I got the pattern idea from.
For this design, I took the blocks that were edited a while ago for much closer to my exact size. I kept defaulting to using the sewing blocks from school, but they're about a size too big even for my dressform! I still think I can decrease the bust size a teeny bit, but I'm going to eventually go back in and tool around with the block sizing for my sample sizes which is essentially exactly my size.
The print on the fabric actually corresponds to the crosswise grain. So technically, this dress is cut incorrectly, but I knew going into it that it would be based on the print. I just couldn't resist placing the heavy print at the bottom and lighter print at the top! It was the perfect shirtdress print for me.
Collar detail.
Even the zipper came out great!
This dress sewed together almost too easily. I would have loved to put pockets into it, but I tried something new for me by having the zipper on both bodice and skirt potion of the dress. I'm usually a center back zip sorta person but this may have changed me a little.
I have one more really fun blog collaboration coming up!
I designed a dress to go with a hat by the lovely Tanith of Tanith Rowan Designs. I've been a little behind due to my work trip to Seattle which was amazing as well as settling into the new job, but I am hoping to have some fun photos up by next weekend!
After that, Manic Pop may go through a few changes (but fun ones) as I focus a little more on random creative projects, inspiration, oddities, and of course, more original pieces I'm working on as I design them.
The dress looks fantastic! I love how you situated the heavy print towards the bottom of the dress and the cuffs. It looks very nice on you too! Glad to hear that things are going well.
ReplyDeleteWhat a beautiful piece of art, and an equally beautiful dress! I love shirtdresses, and this one suits you perfectly. Awesome work.
ReplyDeleteStunning dress & illustration!
ReplyDeletei love it! the pattern is so awesome. I didn't think of using the book to make the actual garments. i know they must be talking to specific patterns, but i dont think they tell you what ones. But if you find a similar one then the instructions would make more sense! just as you've done!
ReplyDeleteI love the illustration too, its gorgeous, just like you in this dress!