
Now did you think I would go ahead and post that hard-edge design page without actually trying it out myself?
On a whim today (8 days off feels like all the time in the world) I decided to head down to my local hardware store and grab some paint. 2 small cans of it totaled almost $30. I decided on Valspar's Wineberry Blush and Acapulco. Pink and orange are colors that were once directed to NEVER be put together I think in the 50s? but by the 60s lots of rules were broken.
A book I bought almost 2 years ago was a huge inspiration with as far as the interior of my house although it already did look like it has been stuck somewhere between 1969-1974. It's just been a matter of injecting fun colors and cool vintage-like thrift finds over the years which has been done.
This photo is an example from Living for Today by Karen Fisher (I had to steal these photos from my own Flickr account!):
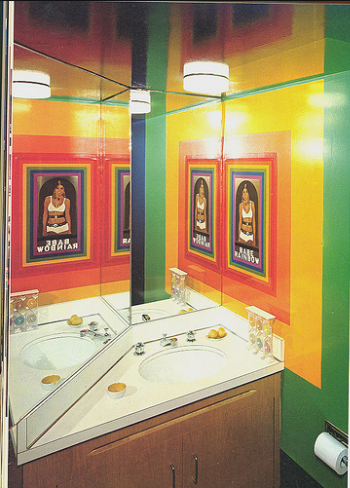
And of course, I LOVE the rainbow detail here.
 See this blog post for the how to on hard-edge design.
So today I started taping off where I wanted my stripes to go!


And gradually...


And here are some finished photos! (The orange is still gleaming a little in this one because it was still drying. It's actually a flat finish.)


Also: I have no idea why some of the wood paneling is missing upstairs here. It's been like that forever! I also like the green splatter on it from previous owners/tenants. This room was apparently painted black or dark blue at one point.

The hardest part about this wall was that it is a stucco finish. This basically means that any masking tape you put down doesn't stick as well as it would on a flat surface. I don't know if this worked to my advantage or against me, but I had to do quite a bit of work with that beveled edge brush.
Even still, there are places that need to be touched up just a little bit but it's not that noticeable. I'll get around to it.
I'm excited about the super-retro paint job!
On a whim today (8 days off feels like all the time in the world) I decided to head down to my local hardware store and grab some paint. 2 small cans of it totaled almost $30. I decided on Valspar's Wineberry Blush and Acapulco. Pink and orange are colors that were once directed to NEVER be put together I think in the 50s? but by the 60s lots of rules were broken.
A book I bought almost 2 years ago was a huge inspiration with as far as the interior of my house although it already did look like it has been stuck somewhere between 1969-1974. It's just been a matter of injecting fun colors and cool vintage-like thrift finds over the years which has been done.
This photo is an example from Living for Today by Karen Fisher (I had to steal these photos from my own Flickr account!):

And of course, I LOVE the rainbow detail here.

So today I started taping off where I wanted my stripes to go!


And gradually...


By this point, I was sick of waiting for the pink stripes to dry, so I used a beveled-edge foam brush. This actually helped me get more precise between both colors.

And here are some finished photos! (The orange is still gleaming a little in this one because it was still drying. It's actually a flat finish.)


Also: I have no idea why some of the wood paneling is missing upstairs here. It's been like that forever! I also like the green splatter on it from previous owners/tenants. This room was apparently painted black or dark blue at one point.

The hardest part about this wall was that it is a stucco finish. This basically means that any masking tape you put down doesn't stick as well as it would on a flat surface. I don't know if this worked to my advantage or against me, but I had to do quite a bit of work with that beveled edge brush.
Even still, there are places that need to be touched up just a little bit but it's not that noticeable. I'll get around to it.
I'm excited about the super-retro paint job!
Comments
Post a Comment