

Well, I documented the making of my sister's wedding dress in 2017, so here we go! This is MY wedding dress for our upcoming wedding!
We are really excited to have gotten the date that we wanted (we didn't even think it would actually be possible) for February 29th, 2020 in Hell, Michigan!
That's right: We are getting married on a date that normally doesn't exist, in a place actually called Hell (which will likely be frozen over), and I am wearing a rainbow dress!
Needless to say, we have always been a bit un-traditional. The way we are doing it makes it beyond exciting for us and VERY memorable. The wedding itself will not be huge, but the party following in June will be inviting family from across the country and even some from other countries.
Alright, let's get down to how I did this!
I actually remember seeing this dress online via the Alice and Olivia fashion show for I think Spring 2016. I was bored on break at work, browsing all of the fashion shows and of course this one jumped out at me.
Months (or even years?) later, I found the image of it in a magazine and knew I had to cut the image out. It's been on my bulletin board since 2018.
I initially started making patterns before we moved from Chicago in 2018, but decided I needed wanted to just edit a pattern instead of do all the pattern work 100% myself.
I think going forward, this is a method I will use for a LOT.
It's crazy to think this dress has been about 4 years in the making for me. Some people will question why I want to wear a rainbow dress (rainbows are happy & bright, about peace and harmony, and are also rare). It's not like I just woke up one morning and made a rash decision about wearing a rainbow dress. This was rolling around in my mind for at LEAST 2 years prior.
I actually started with a pattern I had used before -- New Look 6493 (the one I made a star print jumpsuit with!) because the top looked nearly identical to the top on the Alice and Olivia dress.

Yes, I set out to do a FULL MUSLIN because, duh, this is a wedding dress and it needs to be spot-on. I started with the long dress, view A and edited the skirt part to not have any front pockets and closed the slit on the pattern. At this point, I knew I should have made the skirt a little more flare-like at the bottom, but I went for more of a straight pattern on it anyway.

From here, I started to spec-out my tiers. I knew I wanted them to be all the same size, so I divided them by the length of the overall skirt per the amount of tiers (6).
I extended the tiers a bit for overlap plus seam allowance and also cut up what would end up being the "underskirt" portion into 6 underlayers, adding seam allowance as well.

I thought in chiffon that 45" all the way around for a ruffle would be fine, but I actually ended up cutting out TWO 45" pieces, attaching them together to make 90" of ruffle per tier. Looking back I maybe should have done the max width of my chiffon (58") for both pieces to add up to 116" but oh well.

Muslin construction of the top.

Checking a little bit of how it was looking.

Here is me, adding the ruffles in muslin.

And this is how the muslin was progressing! Many people liked how this looked on Instagram, but we all know I was nowhere near done.

I ended up buying this baby pink charmeuse at Joann which worked out perfectly for the top part of the dress and it was light enough in color to be used for the underskirt below each color tier.

Me still in the midst of sewing the muslin, lol. Wearing a Burda twist top I also made!

So things were progressing nicely even though the ruffles in the muslin seemed overly floofy. I knew this would calm down in chiffon though as chiffon is so lightweight. Some people also liked the floofiness but I know that chiffon does NOT act that way.


Here is the beginning of the color tiers being cut.


Here we are with much of the dress cut out, sitting on my ironing board.

And we were off! I ended up cutting the top twice to create a self-lining versus the facings that the original pattern suggests. Not only did I want to elevate the dress in general with a full top lining, I also needed the coverage as the charmeuse is lightweight enough that it was kind of see-through.
I also ended up tacking the front overlap together at the bust because it made the front not flop open a bit.


Another designer friend of mine suggested to hem the chiffon first by folding it up 1/4" and then stitch. After this was done, you would roll that seam into them hem once more by folding over another 1/4" or so and then encasing this into the hem. THAT WORKED! It also made for a very clean look.
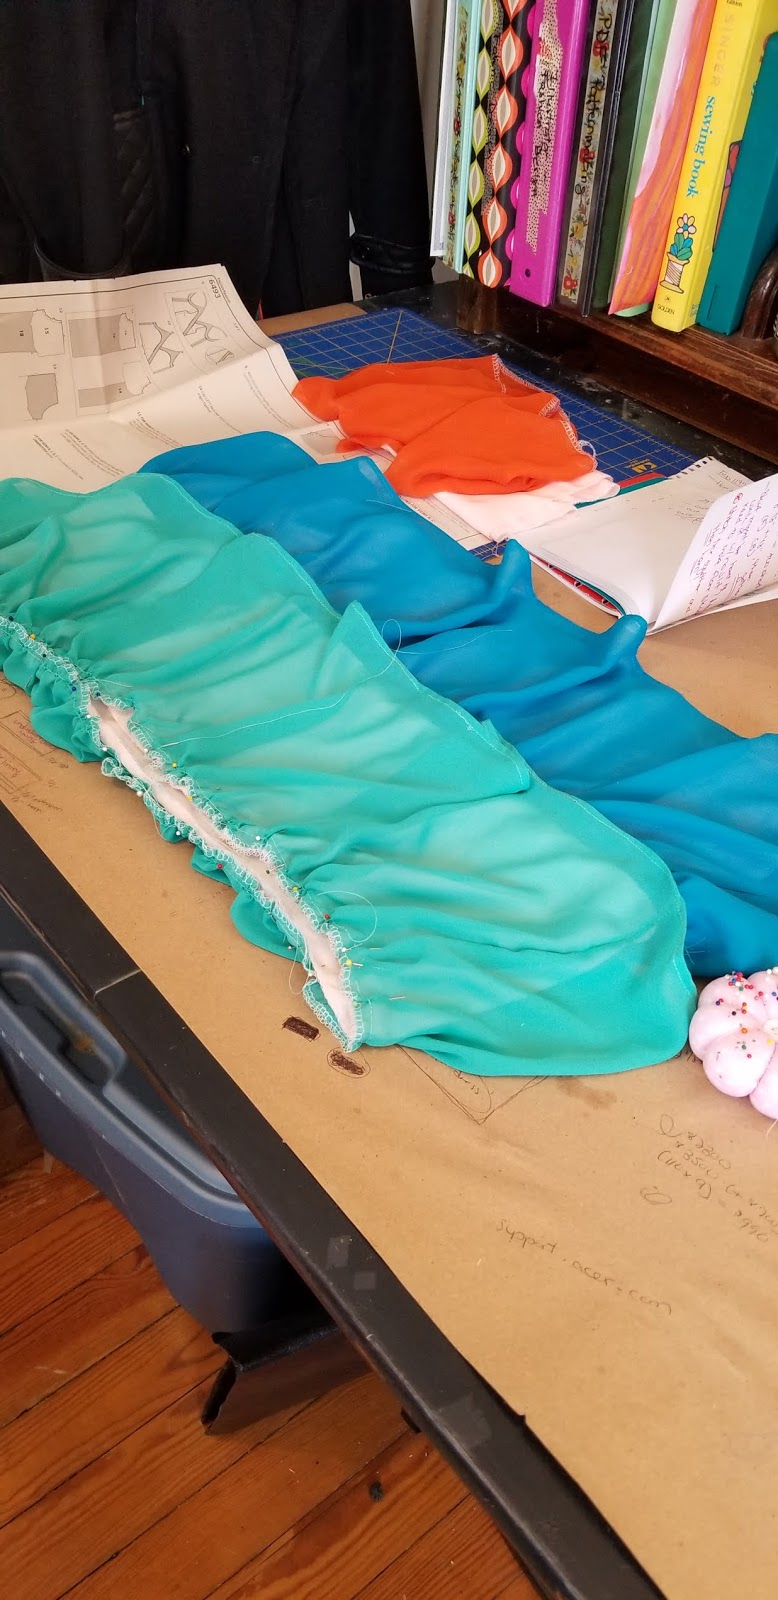

But then it started to look like it was coming together! The lower tiers have more flare to the skirt (3" on each side for a total of 12" added to overall hem) which accounts for the ruffles that ended up near the bottom being "less ruffly".

Here is the dress right before the final (pink) tier was sewed on.

And there it was, looking like a real dress!


I'm going to leave it right here until the big reveal on our wedding day! It's only a few days away, but I am sure I will need to edit some photos before posting.
It was such a gift to be able to work on my wedding dress for a while since I had lost my job on January 10th. Before that, I was wondering how in the hell I was going to get this thing done before February 29th. I was able to make this dress in about 3 weeks including the muslin and actual dress sewing!
The only edits I made to my muslin were adding the flare to the skirt hem (hello, we need to walk!) and then pulling the straps up a bit. Other than that, my pattern was great!
This is where sewing can save you money in the long run -- the original Alice and Olivia dress appears to have retailed for around $700 but my version cost me a little over $100 to make!
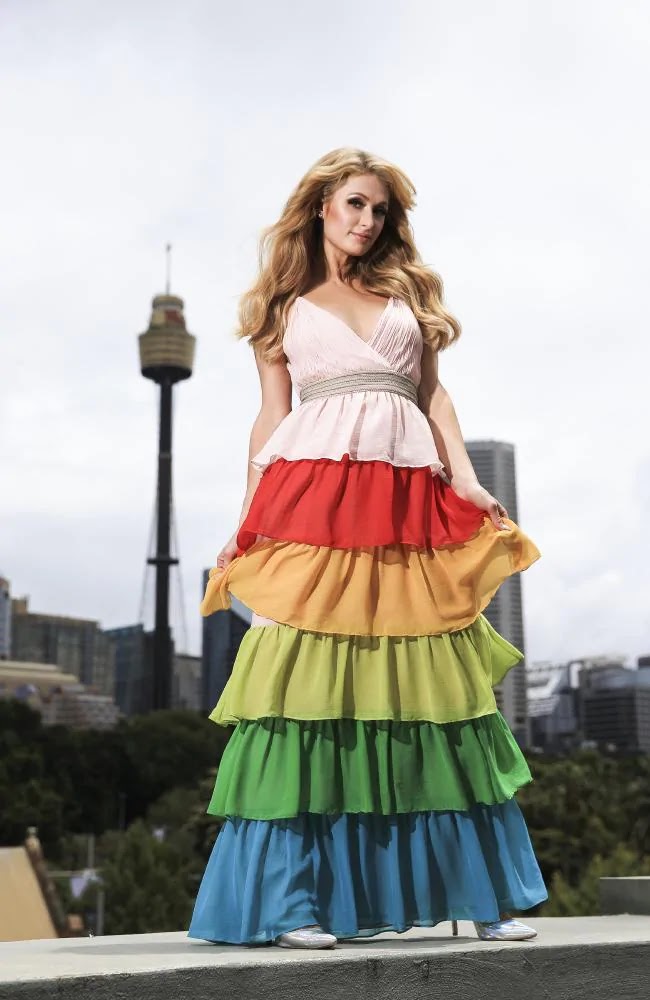
Enjoy a few photos of celebrities and promo photos of this dress too. Busy Phillips, Paris Hilton, and others have worn this dress! I love it!


This girl also said this *would* have been her wedding dress had she had the dress at the time, so at least I know I am not the only one!

My favorite promo photo of this dress!
Comments
Post a Comment