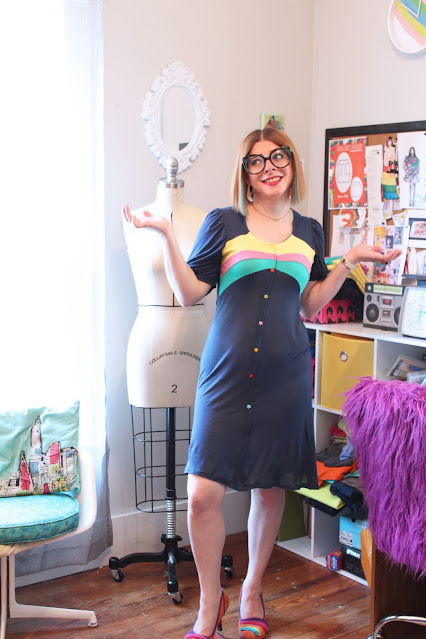
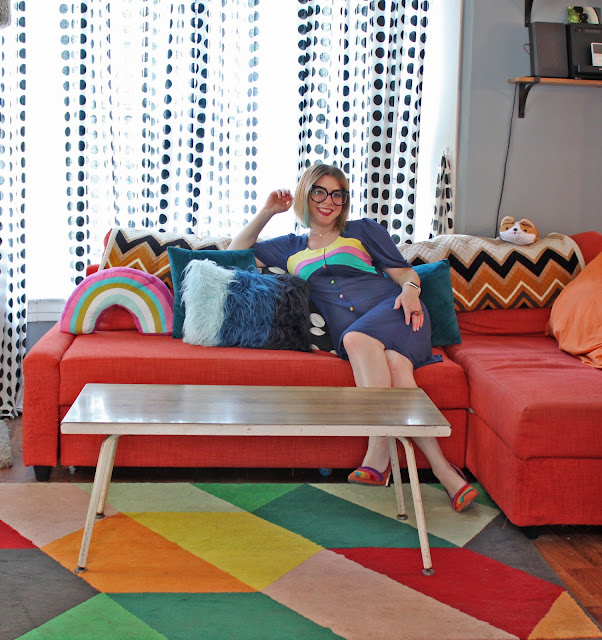
First off, I wanna say that I LOVE this dress.

It's been a long time coming -- a few years ago, I saw a photo of an Ossie Clark Dress that looked almost exactly like this, but I thought I would make my own and update it for current era and fabrics.

However, as you may be able to tell, there is a LOT wrong with this dress, which is my 1st sample. I'll go through what the problems are in this post AND talk about how to fix a 1st sample so hey, at least it still may be wearable for you!
This is the original Ossie Clark dress. Of course, I immediately loved it upon seeing it. Colorblocking and stars always got me (haha). The original dress here is made in a crepe with a much lower neckline than the one I designed. I made mine in a jersey knit (we will get to that in a minute.)
Who was Ossie Clark? Well, he was a 1960s fashion designer from England. He was involved in much of the Swinging 60s fashion we all know and love and typically is connected with surface and print designer, Celia Birtwell as he was married to her.
Oddly enough, I just remembered this: Ossie Clark was friends with artist David Hockney, who actually did a painting of both Clark and Birtwell --- and their cat, Percy. (See below.)
Taking these photos today for this dress? My cat Percy decided he needed to be in the photos.
I swear to God, that was not planned. But an awesome occurrence. I knew little about Ossie Clark until about 2 years ago and my cat Percy was adopted by me in 2012.
OK, onto dress problems!
FABRIC: Ok, I ordered my fabric (all jersey knit) during the height of the pandemic from Mood Fabrics NYC since my friend Deb said they were one of the few fabric places still shipping fabrics.
Immediately on receiving the blue jersey (even though I read carefully) I knew the fabric was WAY too light for what I was doing. But I am that person who is like "Eff it, we'll do it live." And I proceeded anyway. Because what else was I supposed to do?
The yellow, pink, and teal were in fact the right weight. So that was good.
I had drafted the pattern to actually function as a real, working shirtdress -- buttons that actually opened and closed the garment, etc.
But also forgot that most home machines cannot handle button holes in a stretch knit, even reinforced by interfacing. BAH.
So my cranky Huskystar 224 promptly ate a hole straight through the front of my dress.
I guess I didn't do too bad patching up the hole for it to be wearable. But you know I was furious about it!
This also led me to making a "faux seam" down the front and trimming the facing I had created so it wasn't distracting down center front.
So.... ok. My muslin looked really damn good. But the fabric was the proper weight for the muslin. In the fashion fabric that came, the sleeves are far saggier than they should be. Fail. It's really not a pattern issue, just a fabric issue.
More saggy sleeve photos. (You can see that I have more fabric in the back there for a 2nd sample of this dress with a few more edits!)
The other issue I ended up having was the back neck being all stretched and saggy. I find I have this issue with most knit tops (even Simplicity and Burda.) I am not sure in this case if it was indeed my fabric jacking up (it stretched itself out insanely compared to the reinforced facing) but here is a handy way to fix that issue: TUCKS.
This will not be on final pattern draft. I am chopping out a small triangle piece in the center back (kinda like a dart) so the neckline doesn't act a fool. But it's a good way to get your neckline to fit a little better while not making major edits to your garment. I think it works for a wearable sample.
The blue fabric is just SO LIGHTWEIGHT. But hey, you live and learn.
Most designers go through a few samples before they get that perfect fit, pattern, etc.
I really am looking at this being my 2nd sewing pattern release though. I love this style and I think it would be super fun to see others in it.
The dress itself is a 1960s-does-1920s style and I love the fact that this could be something that comes out in the... 2020s based on it's historical fashion references.
 |
Here's the thing though: I am NOTORIOUSLY SLOW when it comes to getting patterns out. Now that I have gone through the release of the Sport Skirt sewing pattern, I have a FAR better idea and a method on how I will be going through the process. I also have built myself templates for efficiency, but I have a tendency to overthink designs.
I think it's because I recognize that not all ideas are good ideas and I like to let things simmer for a bit, for myself to play with what is going on, to edit and edit again. And even after that, there will probably still be edits.
But it's just me here and I get distracted, discouraged, or decide to play with other things like colorful surface design patterns, or writing. Or just playing on the iPad and sketching out clothing that may never, ever happen.
So maybe more behind-the-scenes posts? I dunno. I could do a few more "how tos" perhaps. I feel like I have a unique method of getting the patterns together. I basically took every shortcut I could and made it a part of my process.
But for now, I will have fun wearing this dress around, despite everyone seeing my underwear. I couldn't care less at this point in time. If someone's gonna get all googly-eyed over a mid-30s woman in a dress where you can see her very basic underwear.... maybe you have problems.
Or I guess you could quietly appreciate it even though I have a much more fluffy quarantined body. Your choice, bro! Haha.
My 2nd sample is planning on NOT having the center front seam included, but I am toying with the idea of showing you all how to create a faux center seam from the patterns provided. (Seems easy in theory.)
I do love the center front seam down the front and I really think it's part of the design.
Let me know what you think in the comments! Should I keep the faux center front seam in the pattern release?!


Comments
Post a Comment